how to upgrade your Mac to macOS Sierra | HOW-TO of the week
 Apple released macOS Sierra for public download on September 20, 2016 (version 10.12 of the Mac operating system). macOS Sierra brings a variety of features to the Mac:
Siri: Just ask.
Universal Clipboard: Copy & paste between your iOS device and your Mac.
Auto Unlock: Use your Apple Watch to automatically unlock your Mac.
iCloud Drive: Have your Desktop and Document files automatically backed up to iCloud Drive.
Apple Pay: Use Apple Pay in Safari (if you have an Apple Watch or iOS device with Touch ID).
Optimized Storage: Find ways to free up storage space on your Mac.
Photos: Photos compiles your photos into Memories and also lets you search your photos by what's in them.
Messages: Messages is a little more spiced up.
Tabs: Tabs aren't just for Safari and Finder anymore.
Picture in Picture: Play a video from Safari on top of your other windows.
Follow these steps to get macOS Sierra up and running on your Mac.
1. Make sure your Mac can run macOS Sierra
The following Mac models can run macOS Sierra:
MacBook: late 2009 and newer
MacBook Pro: mid 2010 and newer
MacBook Air: late 2010 and newer
Mac mini: mid 2010 and newer
iMac: late 2009 and newer
Mac Pro: mid 2010 and newer
MacBook Air: late 2010 and newer
Mac mini: mid 2010 and newer
iMac: late 2009 and newer
Mac Pro: mid 2010 and newer
Go to > About This Mac.

Check your Mac model.

Check your Mac model.

2. Backup your computer!
It is very important that you backup your Mac before any major upgrade. If you have an external hard drive, you can use Time Machine to do this.

 3. Download
 3. Download
Once your Mac is safely backed up, find macOS Sierra in the App Store, or click on this link:
https://itunes.apple.com/us/app/macos-sierra/id1127487414?mt=12&ls=1
If the webpage doesn't automatically redirect you to the Mac App Store, click on View in Mac App Store.

Once you're in the App Store, click to download Sierra and wait . . .

If your Mac is not already charging, this would be a good time to plug it in. To be safe, you may want to go to System Preferences > Energy Saver and extend the "Computer sleep" time so your Mac doesn't go to sleep during the download.
https://itunes.apple.com/us/app/macos-sierra/id1127487414?mt=12&ls=1
If the webpage doesn't automatically redirect you to the Mac App Store, click on View in Mac App Store.
Once you're in the App Store, click to download Sierra and wait . . .
If your Mac is not already charging, this would be a good time to plug it in. To be safe, you may want to go to System Preferences > Energy Saver and extend the "Computer sleep" time so your Mac doesn't go to sleep during the download.

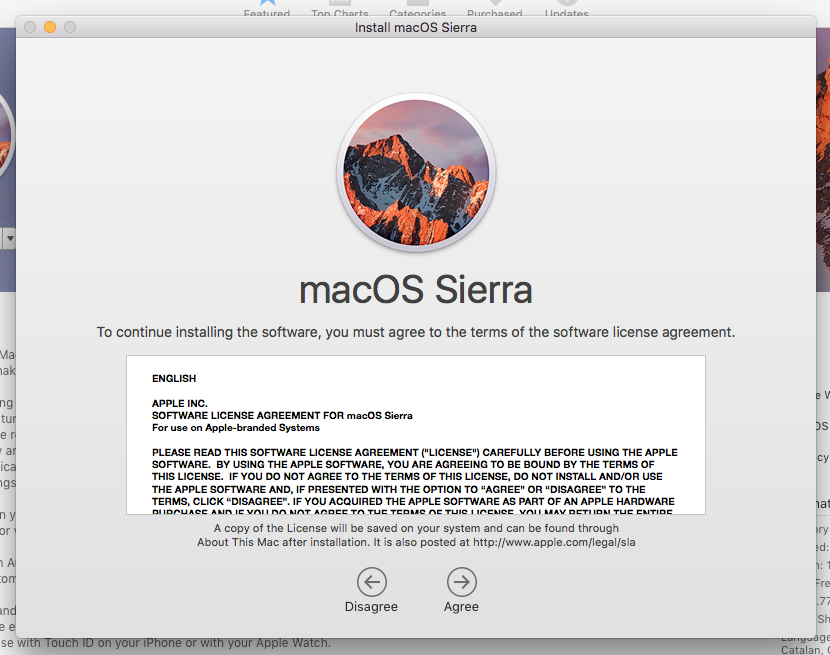
4. Install
When the download finishes, an installer window should automatically pop up.

If you agree, click Agree.
Your Mac will prepare to install Sierra and will restart itself.


Just leave it for awhile.

5. Setup
After Sierra has installed, type in your Mac password.


Then, type in your Apple ID password (or click Set Up Later).

If you want to set up Two-Factor Authentication for your Apple ID, go ahead and do that. Have your phone handy.

If you agree, click Agree.

Choose whether you want your Desktop and Document files automatically backed up to iCloud. I did not want this feature on.

Enable or disable Siri as you wish.

6. Aftermath
Once everything is set up and you're back into your computer, make sure your files are still in place. Then, backup your Mac again with Time Machine.

If you changed your Energy Saver preferences back in step 3, change them back to normal.

And enjoy exploring macOS Sierra!


"Lots of space, aluminum unibody walls, and no complaint about the lack of Windows!"
Siri (describing what it's like to be on a Mac)
Comments
Post a Comment